Introduction
Included in this guide are instructions to assist you with the information that needs to be completed on each page. This guide provides information on updating each page and submitting the changes for your organization's eduroam configuration.
Logging In
To access the eduroam Federation Manager portal, use the link:
The landing page displays all roles available to you in the portal.
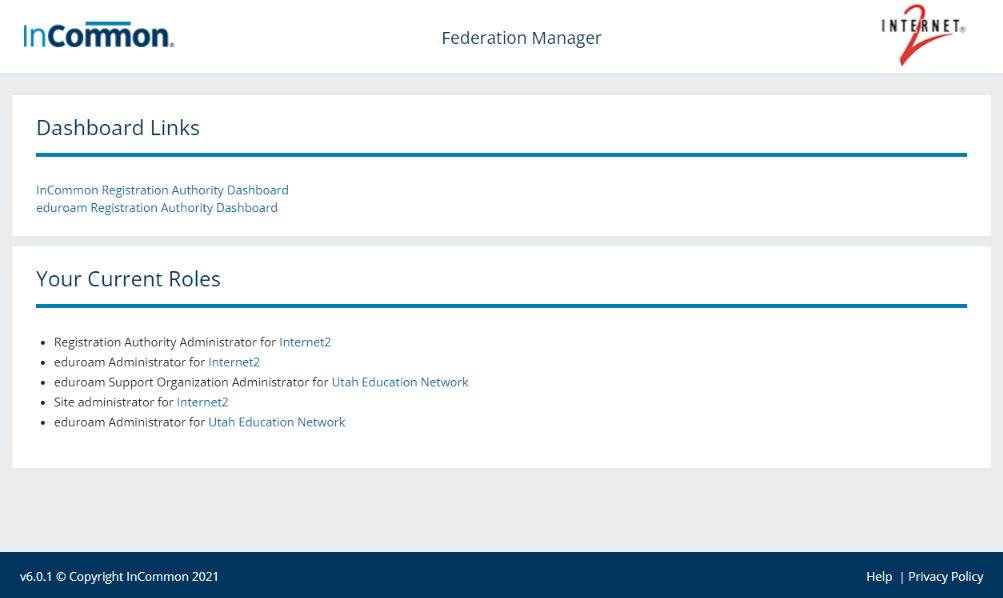
Most users will only have one role to select. Click this link and you will be taken to the Review and Submit page for your organization. If you have multiple roles, select the link next to the organization you would like to access. The Review and Submit page for that organization will be displayed.
Review and Submit
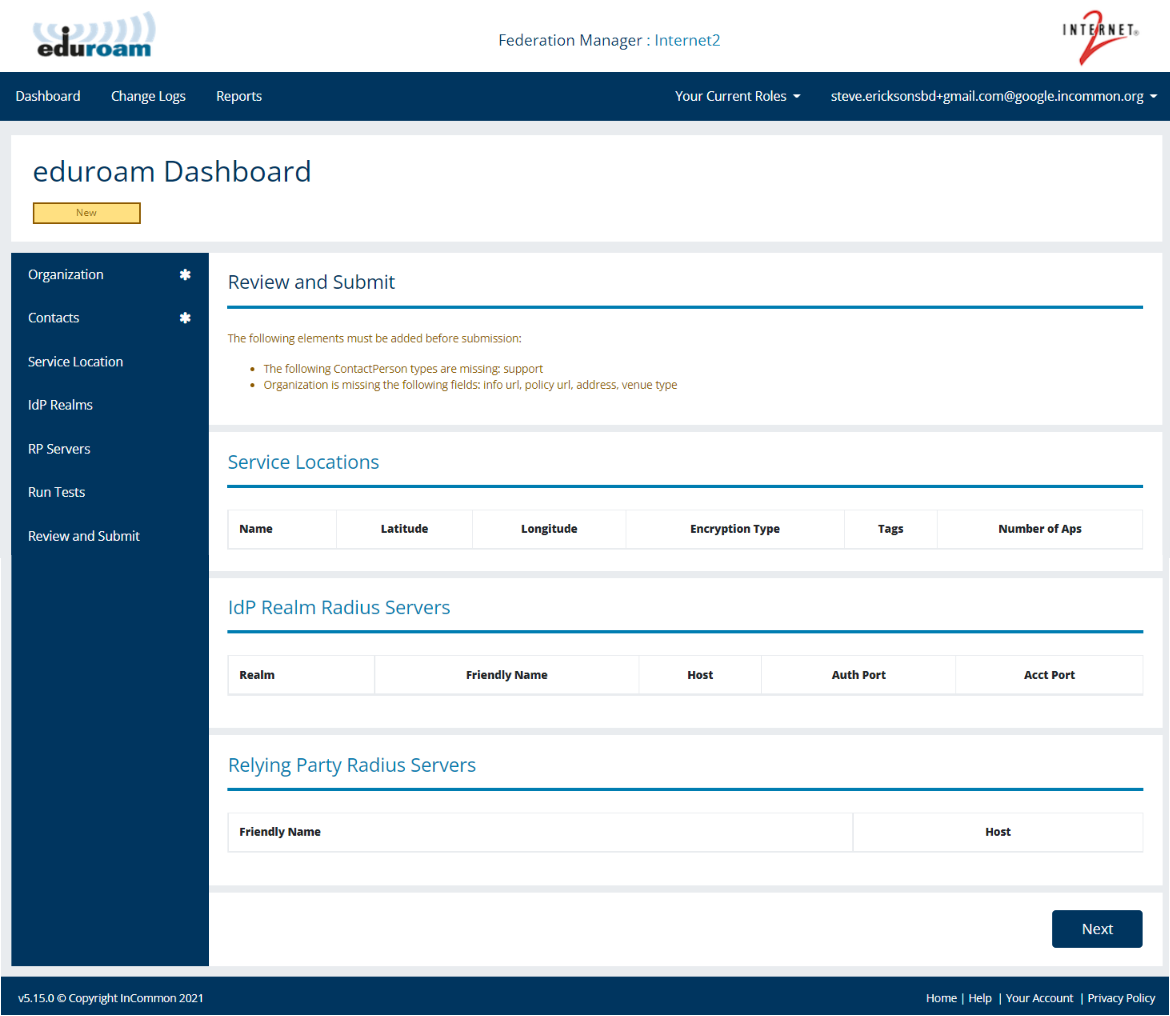
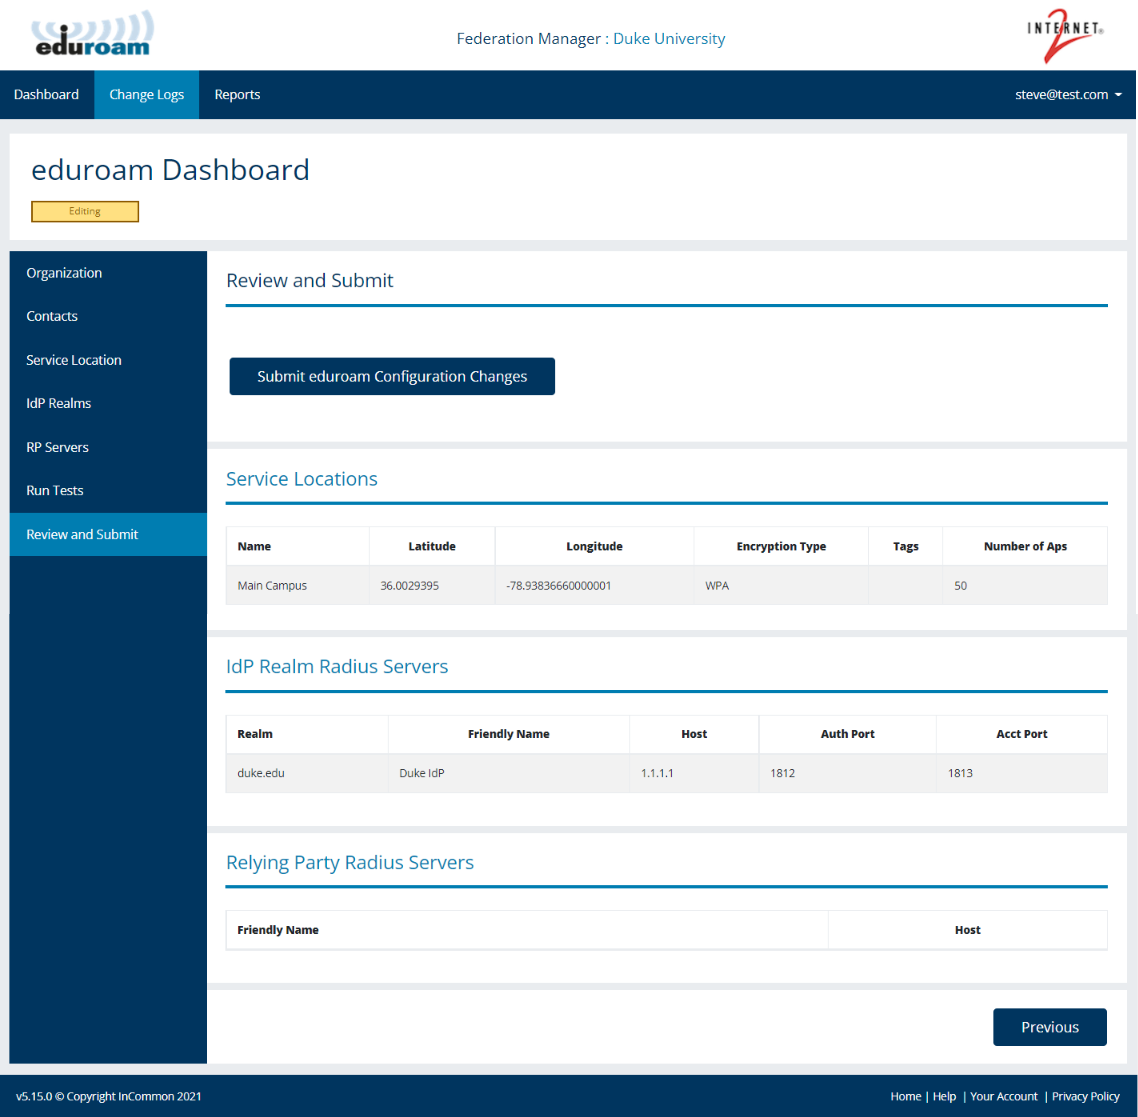
The Review and Submit page provides an overview of your Organization, Service Locations, IdP Realm Radius Servers and Relying Party Radius Servers. If you are a new organization and you have not yet completed any configuration each section will be blank.
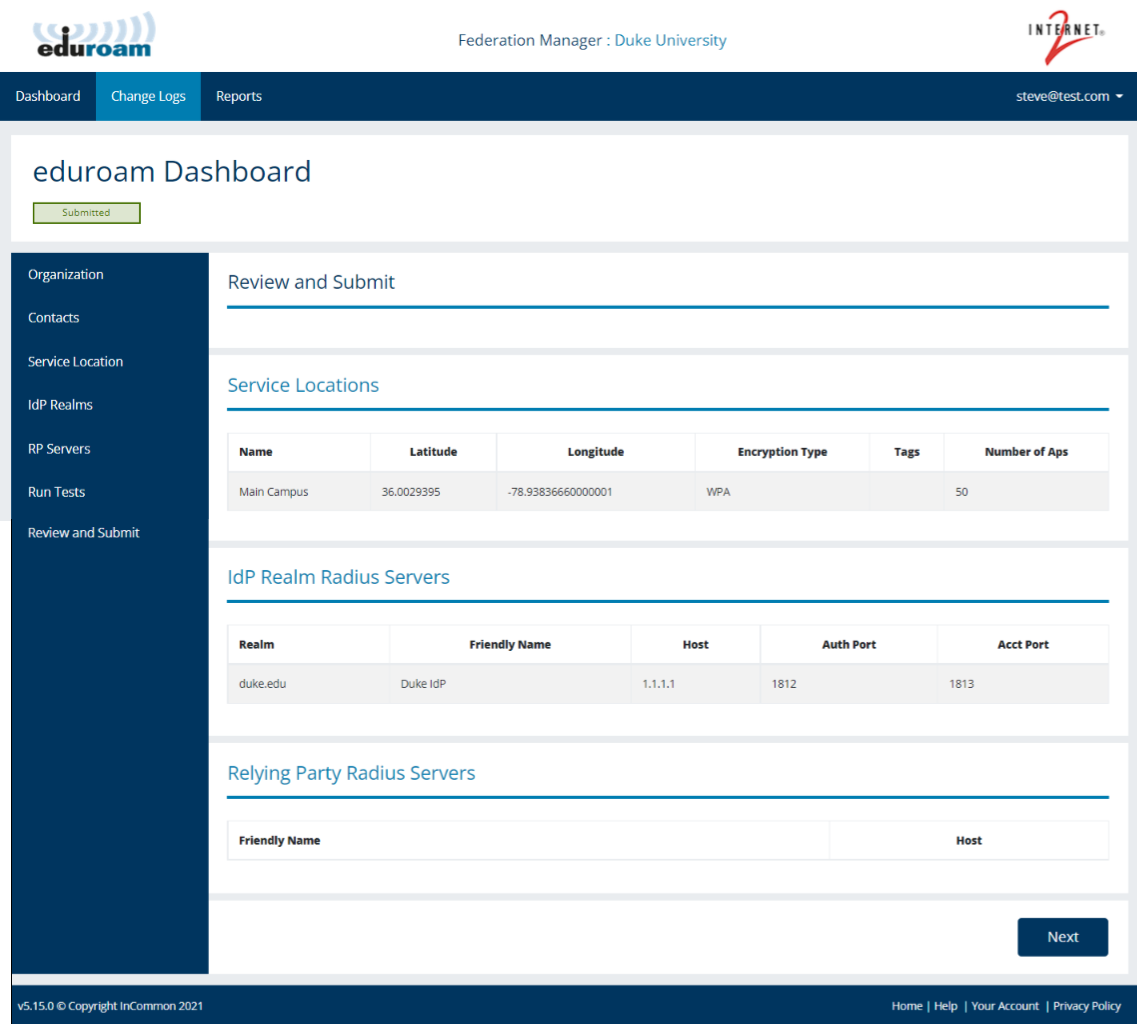
Once you are on the Review and Submit page, you will be able to select the specific page you would like to have displayed by clicking the page link in the left hand navigation or you can click the Next button which will take you to the organization page.
The Review and Submit page is also the page which allows you to submit all changes you have made for Radius configuration. The status displayed at the top of the page indicates the state of your organization's configuration. The Status section describes the different statuses.
Status
New
When you are a new organization and have not yet started to complete your configuration, your status will be new.
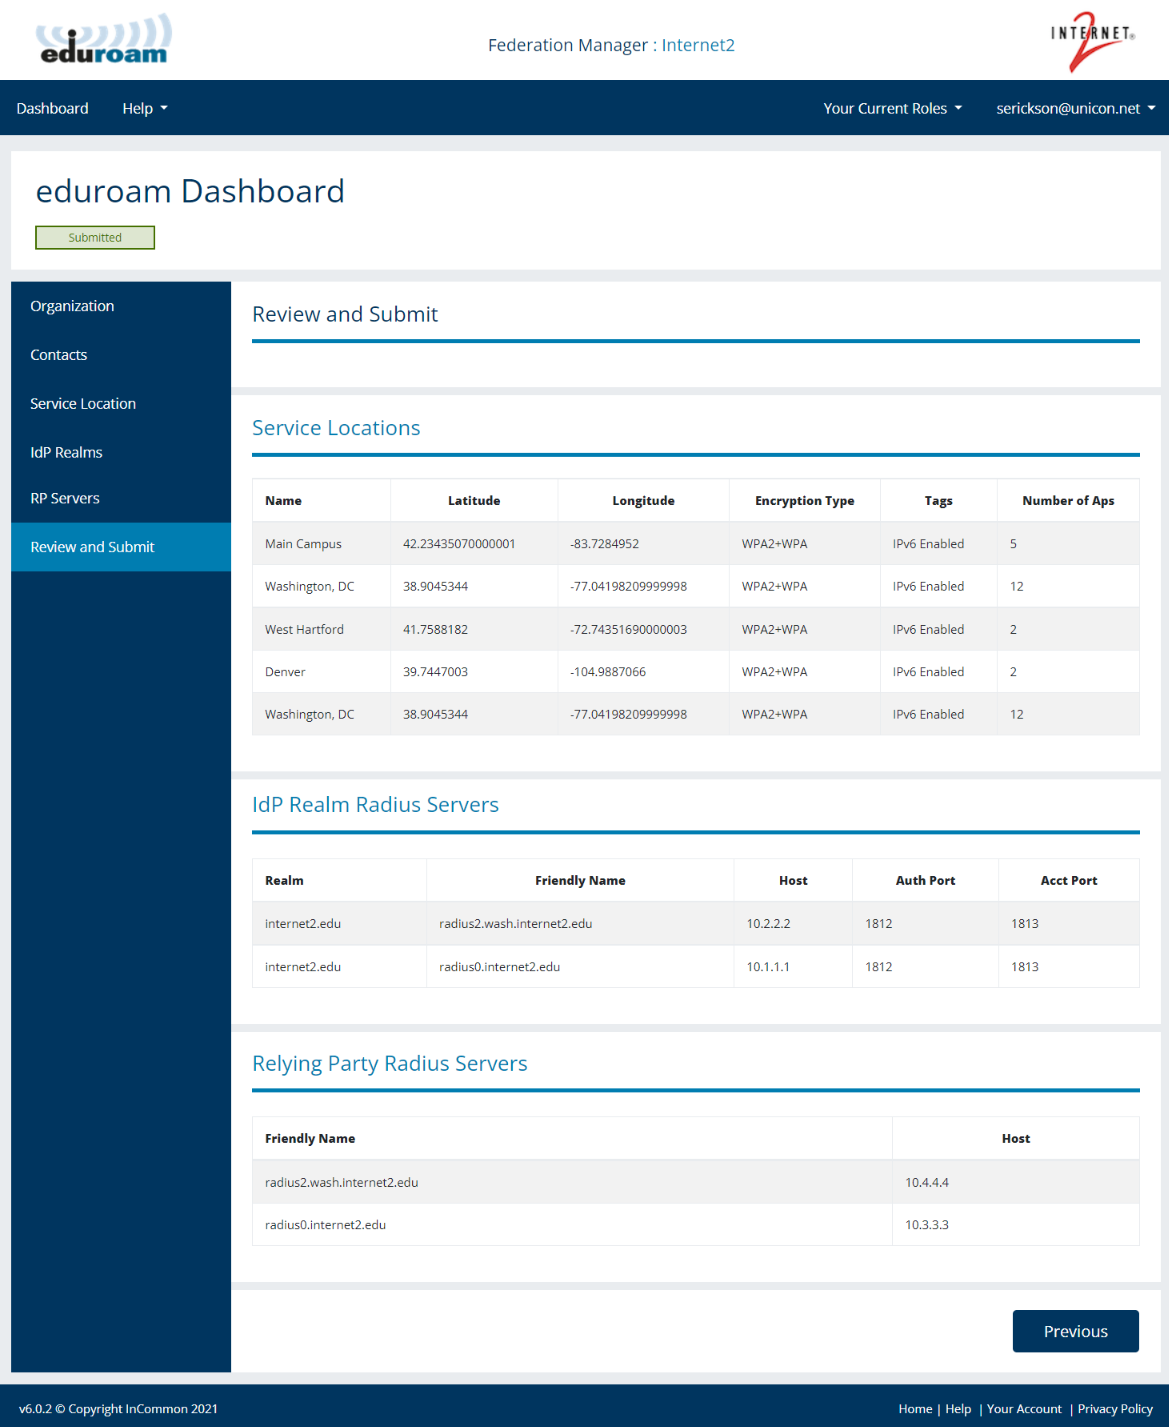
Submitted
The Submitted status indicates your organization's information is live, available to accept RADIUS connections, and listed on the eduroam Map.
Editing
Once you have modified information on any page the status for your organization's configuration changes to Editing. When you have completed all the changes you need to make, click the Submit eduroam Configuration Changes button to save the changes and submit the updates to your configuration. Changes do not need to be completed all at once. You can stop making modifications at any time and leave the application. When you return to the Review and Submit page, you can select to make additional modifications or submit your changes. Changes do not take effect until they are Submitted.
Submitted
Once the changes are saved the Review and Submit page will be re-displayed with the status showing as Submitted. This indicates that all changes have been saved and submitted for your eduroam configuration. Server configuration changes typically take 10 minutes to propagate. Map updates can take up to a day to appear.

Updating your eduroam Configuration
General Hints
Once you have selected to edit, certain indicators will be displayed behind the data field names
- A red asterisk
 identifies this field as required
 - An info icon
 when clicked will provide information to assist with describing the data field
 - When you attempt to Save modifications and there are errors, an error message will be displayed in red such as

- When updates are completed:
- Click the Cancel link to revert the configuration to the last saved values
- Click the Save to save the updated information
- Page navigation is controlled in the following three ways
- In the left navigation, click the link for the page to be displayed
- If you are on a configuration page, click the Previous button to go to the prior page or click the Next button to go to the next page.
This section provides information and screen examples for updating your configuration. Configuration information is presented for the following pages:
- Organization
- Contacts
- Service Locations
- IdP Realms
- Hotspot Servers
Organization
The organization page includes sections for organization details and organization address and contains the information currently configured for your organization.

You can select to edit either the organization or organization address information.
Organization Details Update
To edit the organization details section, click the Edit button at the bottom right of the section. The organization details will be displayed as follows.
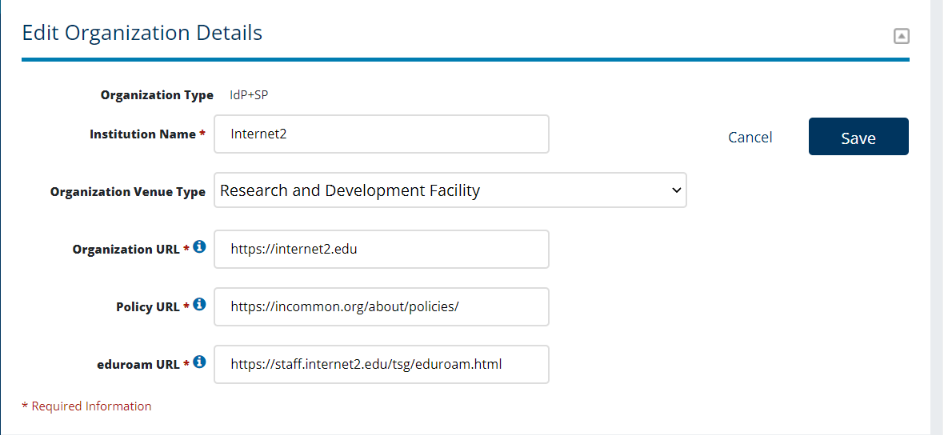
Fields that can be updated will be opened for update. URL fields must be the complete URL and be well-formed.
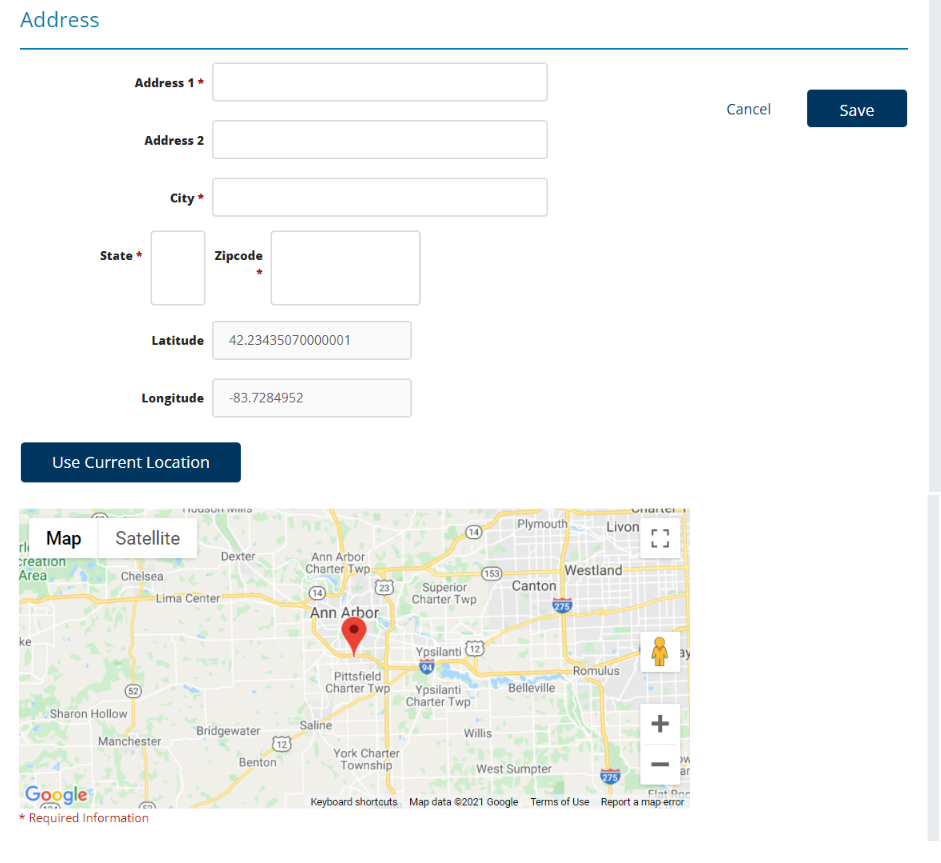
Organization Address Update
To edit the organization address section, click the Edit button at the right of the address. The organization address and map will be displayed as follows.

Fields that can be updated will be opened. Once address information is updated, click the Search for this Address button to update the latitude and longitude and the map. Click the use this address button to update the address with your current location.
Contacts
The contacts page displays the contacts that are currently configured for your organization. Contacts can be updated, deleted and added.
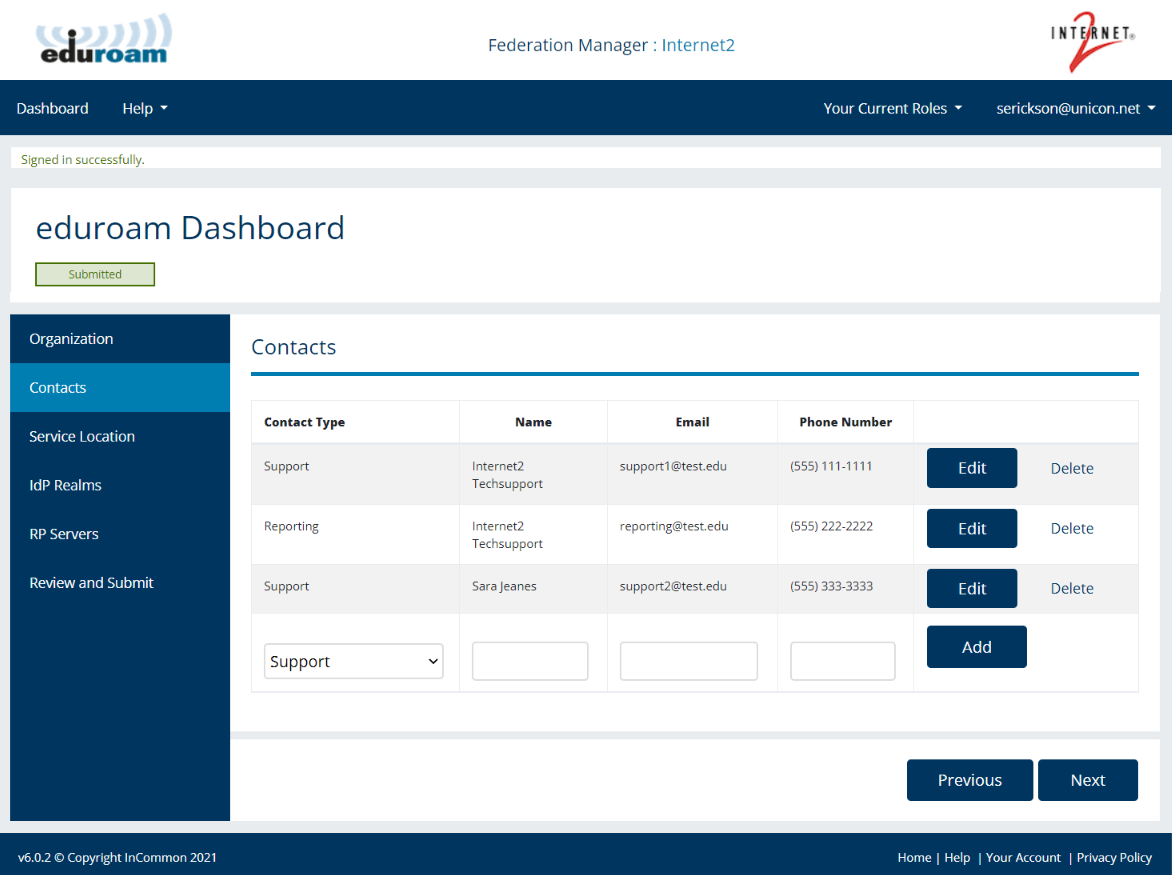
A support contact is required. The support contact will receive critical notifications on service maintenances, outages, and other important updates.
Reporting contacts will receive the monthly, bi-annual, and annual reports for their organization. Note that if you do not designate reporting contacts nobody from your organization will receive these reports.
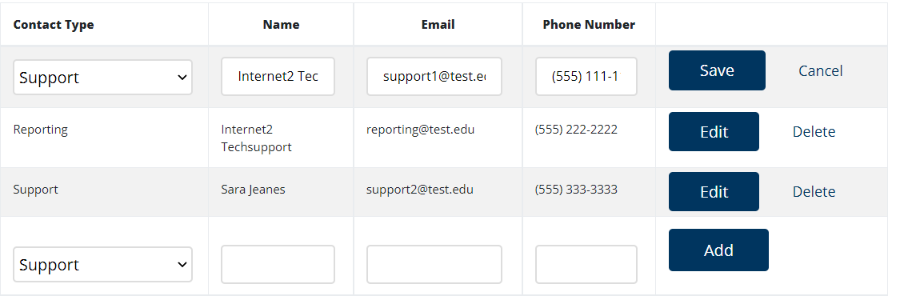
Update Contact
To update a contact, click the edit button. The date fields will be opened for update for the contact selected.
Delete Contact Confirmation
To delete a contact, click the Delete link. A confirmation modal will be displayed for the delete.
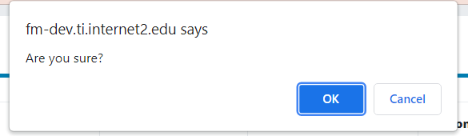
Click the OK button to confirm the delete. The contact will be deleted. Click the Cancel button to cancel the delete.
Add Contact
To add a contact, enter the information in the boxes provided.

The order of the fields to be entered are contact type, name, email and phone number.
Once all information has been entered, click the Add button. The contact will be added and the page will be re-displayed with the new contact displayed in a new row in the table.
Service Locations
The service locations page displays each Service Location that has been configured for the organization. Service Locations can be updated, added and deleted. The service location information you provide here will be reflected in the national eduroam US map. Note that changes made in the eFM may take up to 24 hours to propagate out to the national map.

Edit Service Location
To open the service location to be edited, click the Edit button to the right of the location details.

Delete Service Location
To delete a contact, click the Delete link. A confirmation modal will be displayed for the delete.
Click the OK button to confirm the delete. The service location will be deleted. Click the Cancel button to cancel the delete.
Edit Service Location Address
To open the service location address to be edited, click the Edit button to the right of the address.
Fields that can be updated will be opened. Once address information is updated, click the Search for this Address button to update the latitude and longitude and the map. Click the use this address button to update the address with your current location.
Add Service Location
To add a service location enter the information requested.

Once service location and location address information is entered, click the Search for this Address button to update the latitude and longitude and the map. Click the use this address button to update the address with your current location.
Click the Add button to add the new Service Location. The new service location will be saved and you can then add a new Service Location.
IdP Realms
If you are an SP-only eduroam subscriber, you will not see an option to configure IdP realms.
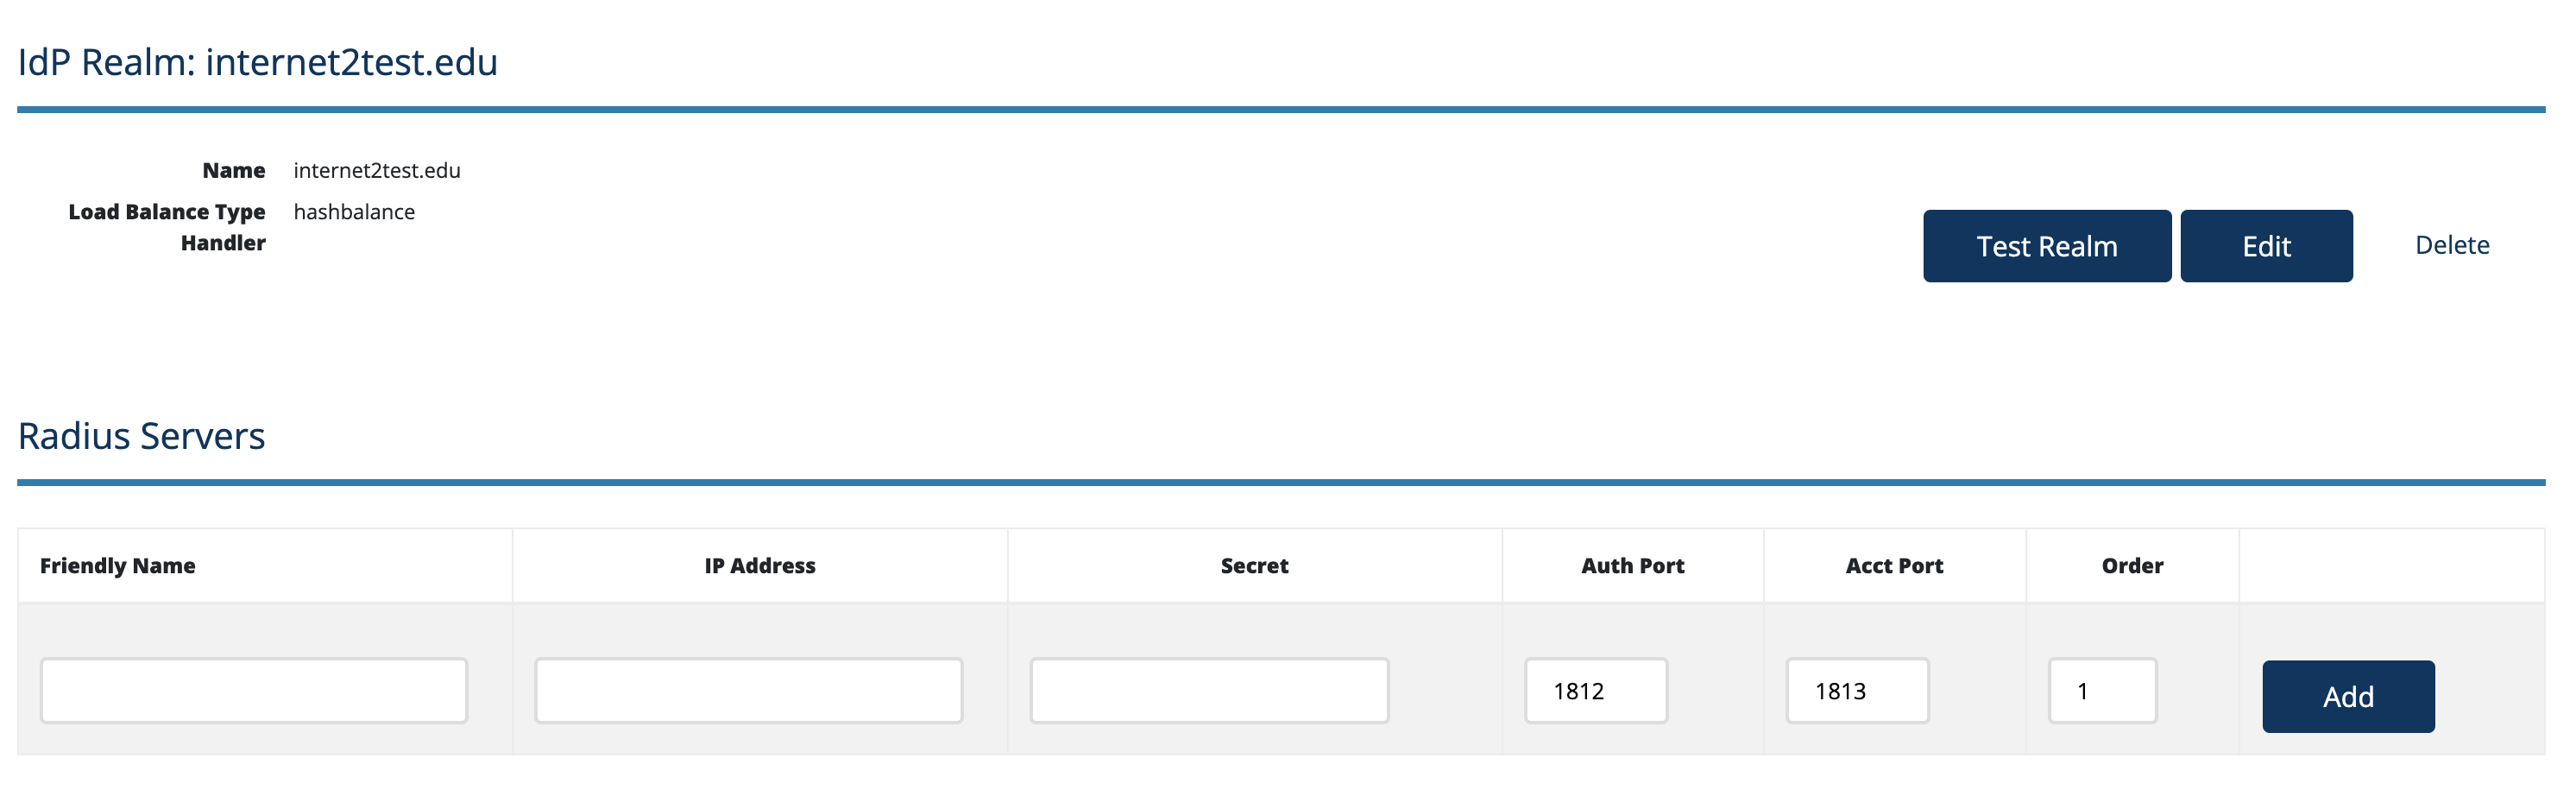
The IdP Realms page displays the IdP realm(s) and all radius servers for the realms. Realms can be edited and added. Radius servers can be edited, deleted and added.
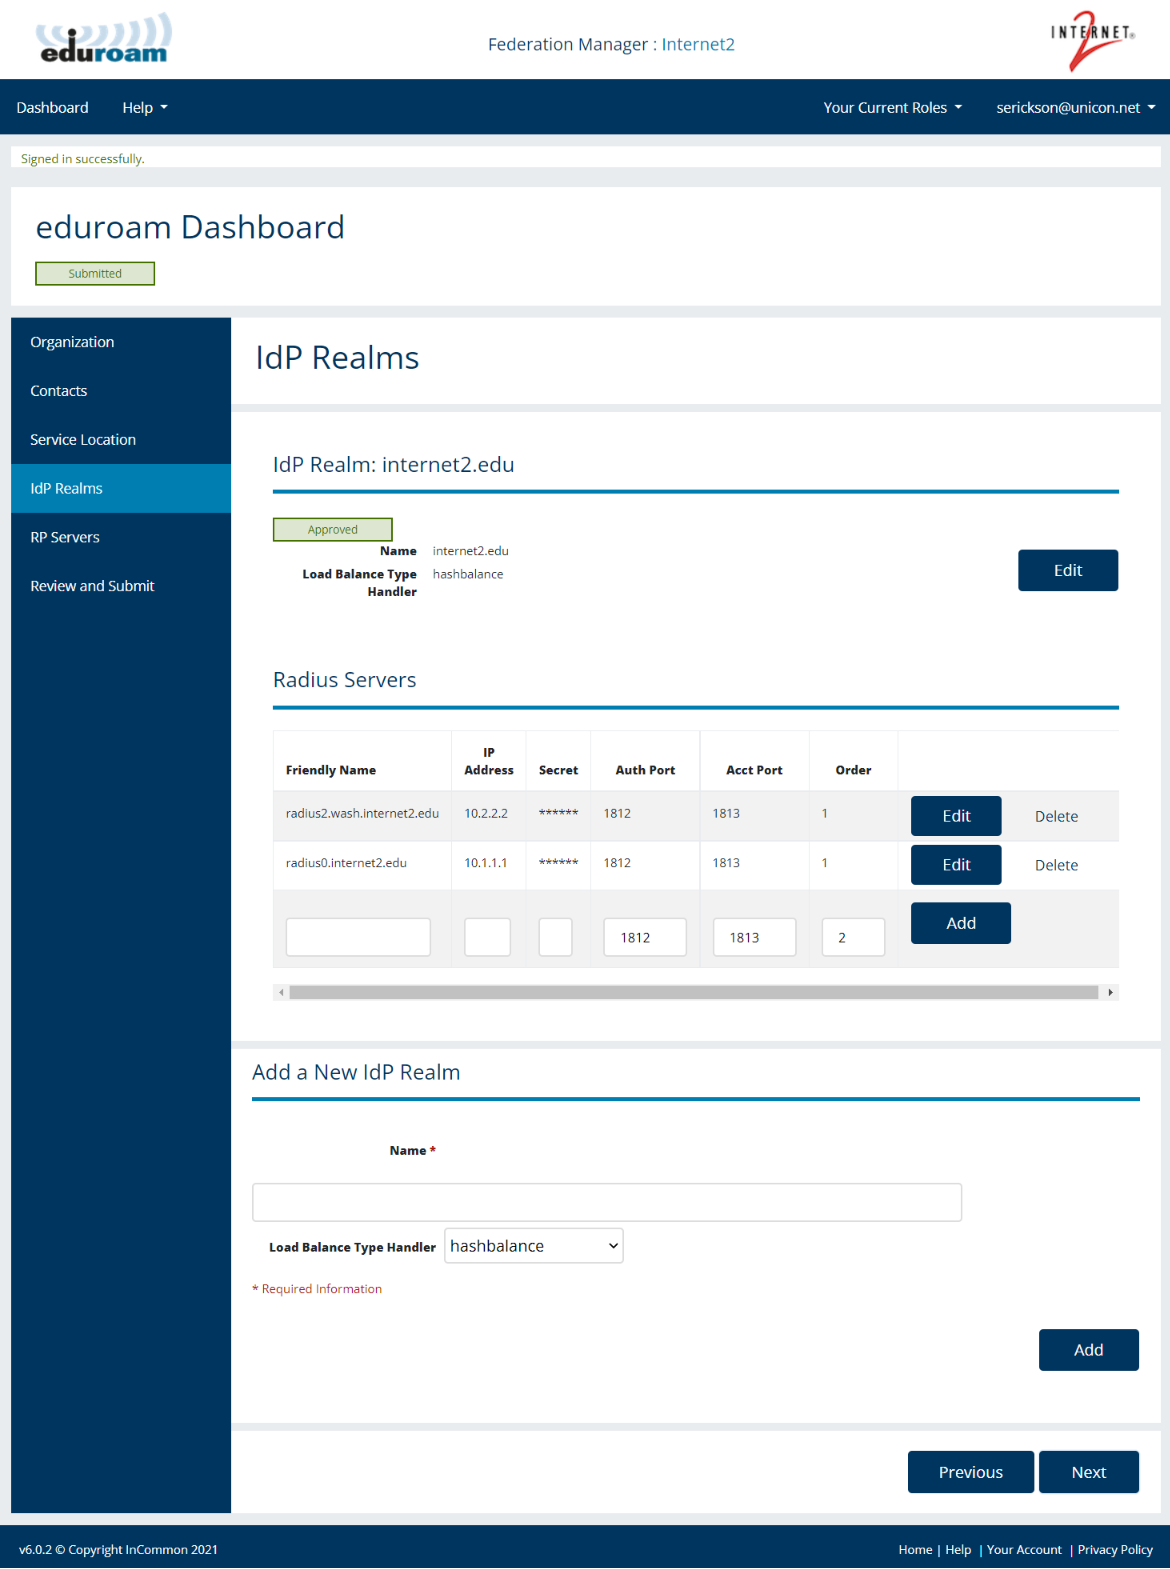
IdP realms that are unique DNS names can be added and ready for use from within the dashboard. Radius Servers can be associated to the realm once the realm is added. To delete a realm, it must have zero Radius Servers associated to it.
Edit IdP Realm
To open the IdP realm for editing, click the Edit button to the right of the realm.

Edit Radius Server
To open a radius server for editing, click the Edit button to the right of the radius server information.

Even though the secret shows as blank, the field does not need to be updated unless you wish to modify your shared secret. If you do choose to modify the secret, the secret may be a combination of uppercase letters, lowercase letters, numbers, and symbols (printable ASCII characters), excluding \ and “ . A minimum of 11 and a maximum of 255 characters are allowed.
Delete Radius Server
To delete the radius server, click the Delete link to the right of the Edit button.
Click the OK button to confirm the delete. The radius server will be deleted. Click the Cancel button to cancel the delete.
Add Radius Server
To add a radius server enter the information requested.

The order of the fields is Friendly Name, IP Address, Secret, Auth Port, Acct Port and Order. All fields are required. The secret may be a combination of uppercase letters, lowercase letters, numbers, and symbols (printable ASCII characters), excluding \ and “ . A minimum of 11 and a maximum of 255 characters are allowed.
Once all information has been entered, click the Add button. The radius server will be added and the page will be re-displayed with the new radius displayed in a new row in the table.
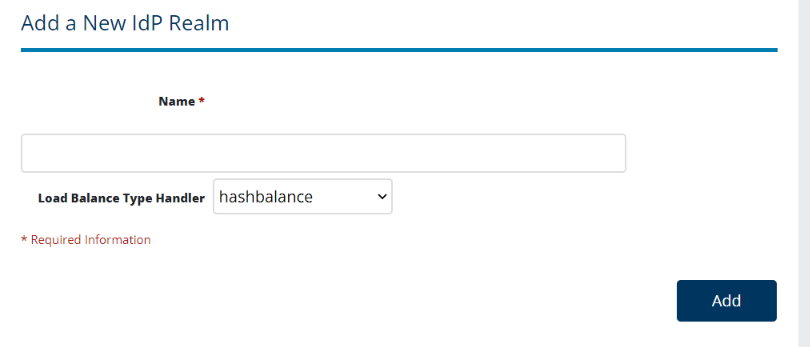
Add Realm
Enter the information in the fields provided.
Realm Added
As long as the realm is a unique DNS name, it will be added and ready for use once you click 'Add.' Now you can associate Radius Server records to the realm. Once a realm is added, all of the eduroam Administrators associated to the organization will receive an email noting the addition of the realm.
Radius servers can be added as defined above. Once a radius server has been added, the realm cannot be deleted. To delete a realm, all radius servers must be deleted.
Hotspot Servers
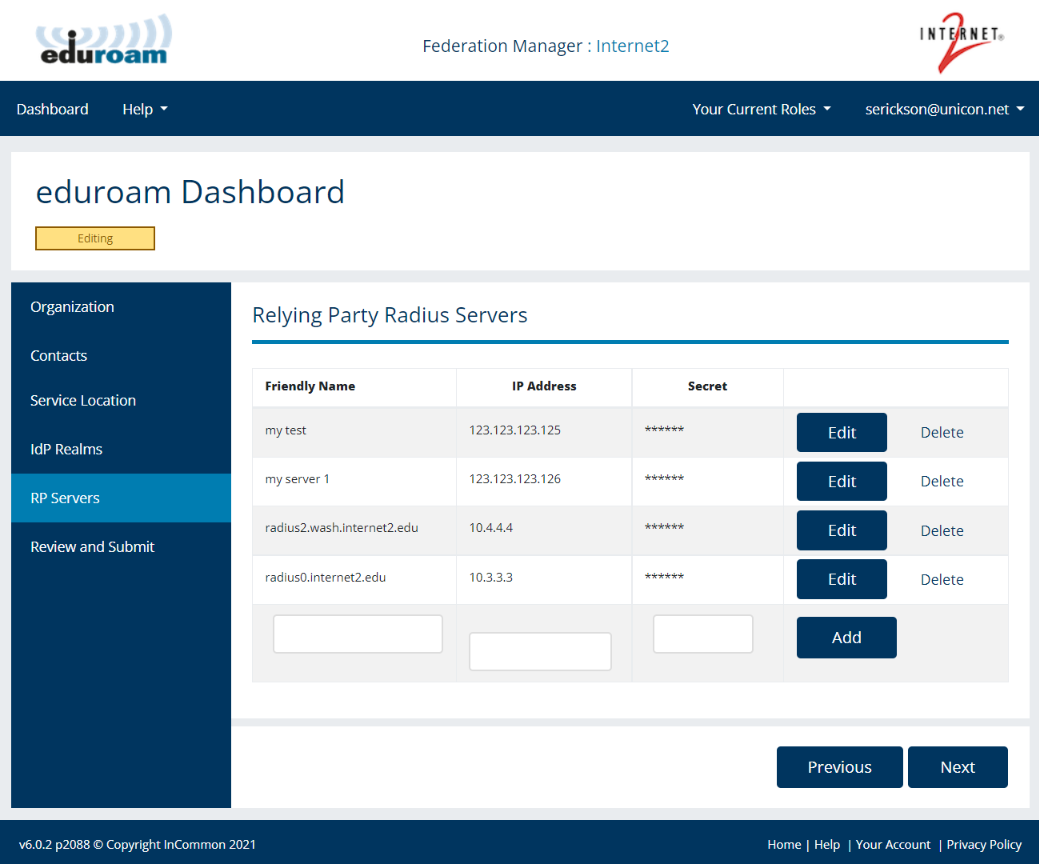
On the Hotspot Servers Page, you will configure the server IP addresses or DNS names for the RADIUS servers or other devices (such as wireless controllers) that will send authentication requests from to your organization to other eduroam subscribers, so that their users can be authenticated, as well as a private secret. Hotspot servers can be edited, deleted and added.
Edit Hotspot Server
To open an Hotspot server for editing, click the Edit button to the right of the Hotspot server information.

Even though the secret shows as blank, the field does not need to be updated. The current secret will be used. If you do choose to modify the secret, the secret may be a combination of uppercase letters, lowercase letters, numbers, and symbols (printable ASCII characters), excluding \ and “ . A minimum of 11 and a maximum of 255 characters are allowed.
Delete Hotspot Server
To delete a Hotspot server, click the Delete link to the right of the Edit button.
Click the OK button to confirm the delete. The Hotspot server will be deleted. Click the Cancel button to cancel the delete.
Add Hotspot Server
To add a Hotspot server enter the information requested.
The order of the fields is Friendly Name, IP Address, Secret, Auth Port, Acct Port and Order. All fields are required. The secret may be a combination of uppercase letters, lowercase letters, numbers, and symbols (printable ASCII characters), excluding \ and “ . A minimum of 11 and a maximum of 255 characters are allowed.
Once all information has been entered, click the Add button. The Hotspot server will be added and the page will be re-displayed with the new Hotspot server displayed in a new row in the table.
Review and Submit
Once you have completed all changes you can either click the Review and Submit link in the left navigation or if you are on the Hotspot Servers page you can click next and the Review and Submit page will be displayed.

When changes have been made, the status will be Editing and the Submit eduroam Configuration Changes will be displayed and can be clicked. When the Submit eduroam Configuration Changes is clicked, your configuration changes will be submitted for your eduroam configuration. Once your changes are submitted, the status will be changed to Submitted.
For a more detailed description of the statuses, review the Status section in this document.
Adding new eduroam Administrators
The eduroam dashboard now allows for self-service user management of eduroam Administrators. You can access this feature by clicking 'Manage eduroam Administrators' from the top navigation of your organization's dashboard.
Adding or removing eduroam Administrators sends an email notification to the other active Administrators notifying them of the change.

View
See a list of your organization’s roster of active eduroam Administrators.
Add
Add a new/existing user to your roster in the role of eduroam Administrator. If the admin has logged into an Internet2 service before, the admin will be matched on email address. If they have not already enrolled will be invited to enroll via email.
Remove
eduroam Adminstrators can also be removed from this screen. Removing a user has no effect on any of their other roles outside of the Organization you are editing.
Resend Enrollment Email
In the event that one of your users needs a new IAM enrollment email, this feature allows you to send it to their email address on record. Typically these invites expire after 7 days.
Testing your eduroam deployment
The eFM includes two tools for eduroam testing. One to see if visiting users will be able to authenticate using your eduroam deployment, and another to see if your users will be able to connect to other eduroam locations while roaming.
eduroam Admin IdP Realm Testing
Once an IdP Server and Realm have been submitted, eduroam Administrators are able to test the configuration of a Realm to ensure it is responding to requests via three authentication methods: EAP-PEAP, EAP-TTLS, EAP-TLS.
How to test an eduroam Realm
Prerequisites: Your Realm is approved, your Realm and corresponding IdP server information has been submitted as part of your configuration
- Log into the eduroam Federation Manager
- From the top nav bar, click 'Test Realm(s)' or from the IdP Realms tab, click 'Test Realm' next to the Realm you wish to test
- Select the Realm to test
- Select the authentication type to test, either EAP-PEAP, EAP-TTLS, or EAP-TLS.
- Enter a username/password and and/or certificate for an active eduroam user on the IdP being tested
- Click 'Test'
- Results appear in about 10 seconds towards the bottom of the page along with a history of sent requests

Your credentials will not be saved by the Federation Manager. Each request will result in four results, representing the two TLRS servers and the two real servers running behind each of the TLRS virtual servers.
Successful Result
A successful result will be in a green box, and have a result of ‘OK’. Each result will be late
Error Messages
A result with an error will be in a red box and have one of two error messages.
access-reject
An access-reject reason can result from a mistyped username/password or one that is not valid for the realm and IdP. An access-reject will also be returned if the IdP server’s shared secret in eduroam Federation Manager does not match the shared secret configured on the IdP server.
timeout
The IdP server for the chosen realm is currently unreachable. This may be because the server is currently offline, not configured to respond to requests, or the request are currently being blocked by a firewall.
eduroam Admin Hotspot Testing
Overview
The eduroam Federation Manager Hotspot Testing tool allows administrators to generate a shortlived TLS certificate and download installers which can be used to test whether visiting users can authenticate at their location. Essentially you will be creating a temporary user and seeing if that "user" can successfully connect using your eduroam environment.
You can access the testing tool in the eduroam Federation Manager (eFM) by selecting the "Testing" tab at the top of the interface.
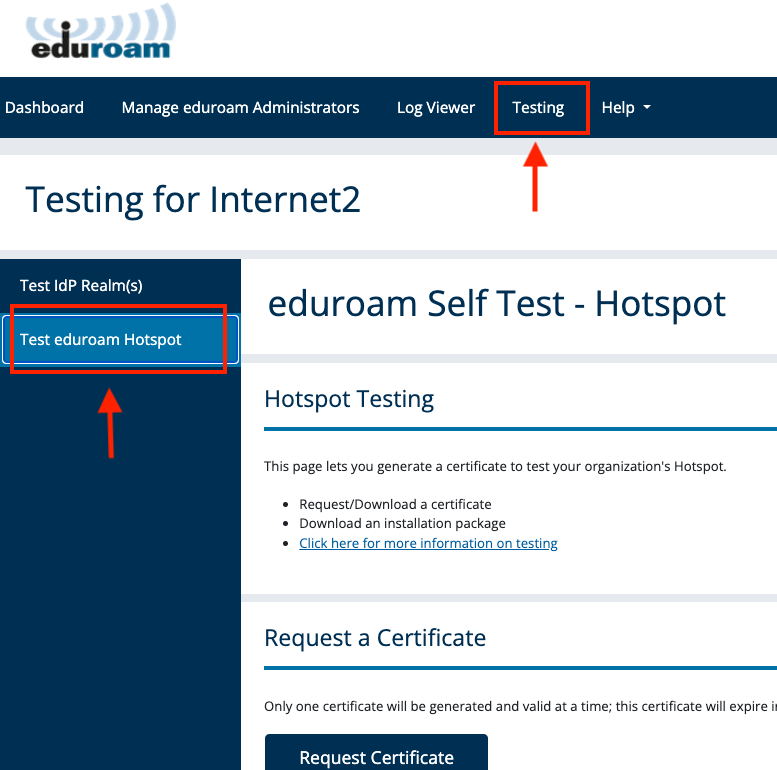
Note: Administrators of organizations that are both an IdP and SP will see options to "Test IdP Ream(s)" and "Test Relying Party". Administrators of an SP-Only organization will only see an option for "Test Relying Party".
How to use the testing tool
There are three steps in using the Hotspot Testing tool.
- Generate test user credentials via a test certificate
- Download appropriate installers
- Perform testing
Let's walk through each step...
Certificate generation
This part of the tool will provide you with a set of test credentials in the form of a temporary SSL certificate. Clicking the request button begins the process of provisioning your certificate, and will set the request status to "Pending".

When the provisioning process is complete you'll be presented with the option to download the certificate. You'll also see the expiration time of your test certificate. Note that you can only have one certificate issued to your organization at a time. The certificate can also only be used from your configured Hotspot site.
The certificate is password-protected with the password 'eduroam'

Downloading installers
To assist administrators in testing, we've put together some installers which you can use to set up a wireless profile for your test user. Download the appropriate installer via the link. The installers are generated and maintained using the eduroam Configuration Assistant Tool and kept up to date by the eduroam US team. Note that downloading the installers is not a requirement for running this test - they're simply provided to make life a little easier for eduroam administrators. You may also need to clear your existing eduroam credentials by telling the device you will use for testing to 'forget' the network before running the appropriate installer.

Performing the test
The process for testing using a laptop or other wireless device is the same as provisioning a regular user. Ensure that the certificate is saved on the device and run the installer package, or configure a profile manually. Then, the device should connect to the network when selected in the system settings.